Upgrade procedure for non Link-Live users: Difference between revisions
Jump to navigation
Jump to search
No edit summary |
No edit summary |
||
| Line 23: | Line 23: | ||
| | ||
[[File:LRG2RecoveryMode.png|border|center| | [[File:LRG2RecoveryMode.png|border|center|300px|LRG2RecoveryMode.png]] | ||
| | ||
| Line 31: | Line 31: | ||
| | ||
[[File:LRG2ManualUpdate.png|border|center| | [[File:LRG2ManualUpdate.png|border|center|300px|LRG2ManualUpdate.png]] | ||
| | ||
| Line 40: | Line 40: | ||
| | ||
[[File:LRG2AboutTester.png|border|center| | [[File:LRG2AboutTester.png|border|center|300px|LRG2AboutTester.png]] | ||
Latest revision as of 19:21, 8 January 2019
Introduction
| If your unit is claimed to Link-Live then we highly recommend following the 'regular' Firmware Update procedure via Device Settings. |
If for any reason your unit is not claimed in Link-Live, then you will need to follow this manual update procedure.
Solution
- Download the latest firmware from MyNetscout here
- Don't unzip; just copy the zip file to the micro SD card provided with the unit
- Power off your LRG2 unit
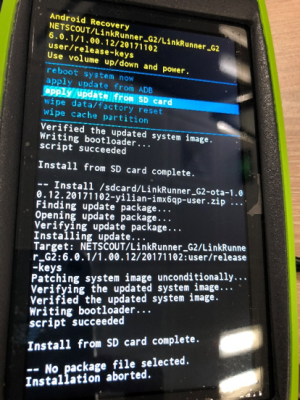
- Press and hold (at the same time) the volume-up button and the power button on your LRG2 unit
- The LRG2 unit will power on and enter recovery mode
- Use the volume buttons up/down to select “apply update from SD card”, and use the power button to confirm the selection

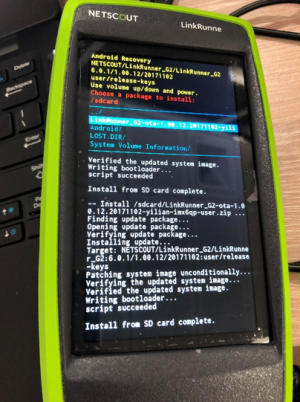
- Use the volume buttons up/down to select the LRG2 firmware that you copied to the micro SD card and select upgrade

- Restart your LRG2 unit.
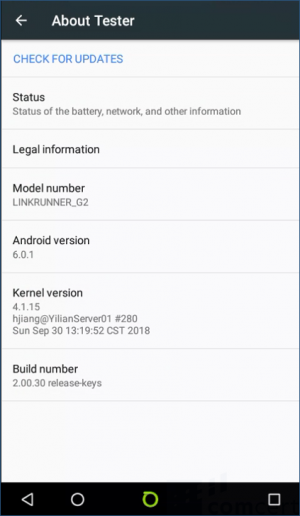
- After power-up, on the Home screen enter Device Settings >About Tester >CHECK FOR UPDATES, and check if the version number been updated to the latest version
